
Moving your business to Microsoft 365?
Move the email. Move the files. Set up the users. Done. Sounds simple, right?
That’s not the real case; anyone who has actually handled a migration knows there is usually a little more to it.
A question on Reddit from an IT admin planning a Google Workspace to Microsoft 365 migration summed up the situation well: they knew they wanted to move mail and files, but were not sure about things like SSO, migration tools, and how long to keep the old environment active.
And that’s often the tricky part of a Microsoft 365 migration.
You also need to think about your users, applications, devices, security, and what happens after everyone starts using Microsoft 365.
The good news is that you don’t need to make it complicated.
Whether you’re moving from Google Workspace, an on-premises Exchange server, another cloud platform, or one Microsoft 365 tenant to another, the process can be broken down into a few simple stages:

This blog is all about that. We walk you through each stage in simple terms, so you know what to prepare, what to watch out for, and what to do after the migration is complete.
Quick tip:
Don’t try to migrate everything at once. Start with a clear plan, test the process with a small group, and then move the rest of your users into manageable batches. Microsoft also recommends choosing your migration approach based on your source environment and the workloads you’re moving.
What is a Microsoft 365 migration?
A Microsoft 365 migration is the process of moving your organization’s work and data to Microsoft 365.
Depending on your current setup, this might include:
- Email and calendars
- User accounts
- Files and documents
- Microsoft Teams
- SharePoint and OneDrive
- Applications
- Devices
- User permissions
The exact migration will look different for every organization.
A small company moving from another email provider may have a relatively simple migration. A larger organization moving from an on-premises environment or another Microsoft 365 tenant will have more to consider.
But the basic process remains the same.
Microsoft 365 migration checklist
Before we get into the details, here’s the simple version:
- Plan what you need to move
- Review your users and data
- Prepare your Microsoft 365 environment
- Choose a migration approach
- Test with a small group
- Migrate your users and data
- Check that everything works
- Help users get comfortable with the new environment
- Automate and improve your IT processes
Now let’s look at each step.
1. Start by figuring out what you're moving
Before you start moving anything, take a step back and look at your current setup.
You don’t need to document every tiny detail on day one. Just get a clear picture of what you’re working with.
This is also a good time to clean things up.
If you have old user accounts nobody uses, files nobody has opened in years, or applications that have quietly been forgotten, you probably don’t need to take all of that with you.
2. Get Microsoft 365 ready
Once you know what you’re moving, it’s time to prepare the new environment.
Set up your Microsoft 365 tenant and make sure the basics are ready:
This is also the time to get your security in place:
Think of it like moving into a new house. You don’t want the boxes arriving before the electricity, internet, and basic utilities are ready.
3. Decide how you want to move
Not every Microsoft 365 migration needs to happen in the same way.
If you have a small team, you may be able to move everyone within a single migration window.
If you have hundreds or thousands of users, moving everyone at once can make things unnecessarily stressful. In that case, it usually makes more sense to move people in smaller groups.
For example, you could start with your IT team, then move a few business teams, and finally move everyone else.
There’s no single “right” migration method. The best approach depends on where you’re starting, how much data you have, and how much disruption your business can handle.
4. Try it with a small group first
This is probably one of the most useful things you can do before the big move.
Pick a small group of users and migrate them first.
Don’t just choose the IT team. Include a few people who use different applications, work from different locations, or have different types of files and devices.
Then ask them to actually work as they normally would.
This is where you’ll often find the little things that weren’t obvious during planning.
Fix those issues now, while you’re dealing with 10 or 20 users, rather than after you’ve moved everyone.
5. Now it's time to move
Once your test group is working well, you can start the actual migration.
If you’re moving in batches, keep each group manageable and give your IT team enough time to check things before moving on to the next one.
Keep an eye on the migration as it happens. If something fails or a user suddenly can’t access something important, you’ll want to know about it quickly.
And don’t worry if everything doesn’t go perfectly.
Most migrations have a few bumps along the way. The important thing is to catch them early and deal with them before they affect more people.
6. Don't forget to check what actually moved
When the migration says “complete,” resist the temptation to immediately close the project.
Take some time to check the things your users actually care about.
You don’t need to test every possible scenario. Focus on the things people use every day.
A migration isn’t really successful just because the data moved. It’s successful when people can get back to work.
7. Expect a few questions
Even if everything goes smoothly, your helpdesk is probably going to get busier for a while.
Someone won’t be able to find a file.
Someone else will forget their new sign-in details.
Another person will say Outlook isn’t working.
And that’s completely normal. Make it easy for users to get help. A few simple knowledge base articles covering the most common questions can take a lot of pressure off your IT team.
It’s also worth having a clear support process ready before migration day. You don’t want to figure that out while 500 people are asking for help
8. Once everyone is settled, connect the pieces
This is the part that’s often overlooked.
After everyone has moved to Microsoft 365, you have a great opportunity to make your IT processes simpler too.
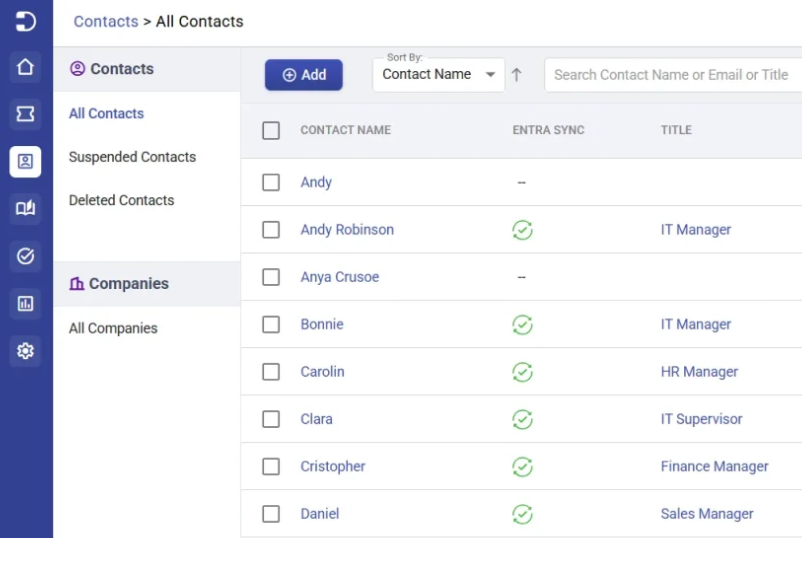
For example, your Microsoft Entra ID directory already contains important information about your users. Instead of asking your IT team to maintain the same information manually in the helpdesk, you can connect the two.
With Desk365, you can use Microsoft Entra ID user provisioning to automatically create and update contacts in the helpdesk as user information changes.
So when someone joins the company, changes their details, or leaves, your helpdesk doesn’t have to be updated separately every time.
Keep your Microsoft 365 users in sync
Connect Microsoft Entra ID with Desk365 and keep user information automatically up to date.
9. Bring your devices into the picture
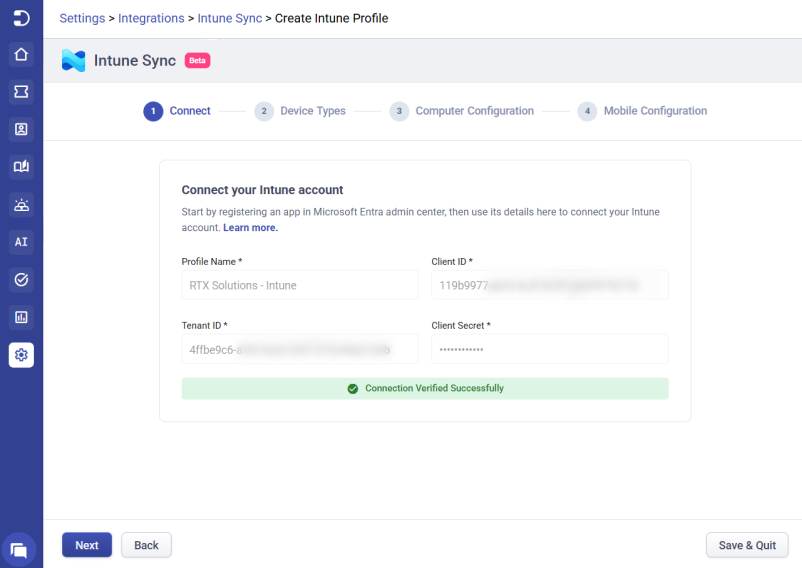
If your organization uses Microsoft Intune, there’s another useful connection you can make.
Intune already knows a lot about your organization’s devices. Your helpdesk can use that information too.
Desk365 can sync Intune-managed devices into Asset Management, giving your support team access to device information while they’re working on tickets.
So instead of asking someone:
“Which laptop are you using?”
your support team can already have that information available.
Bring Intune devices into your helpdesk
Sync your Intune-managed devices with Desk365 and make it easier for your team to support users.
10. Look for the things you're still doing manually
Once the migration is over and things have settled down, take a look at your team’s day-to-day work.
These are good candidates for automation.
Desk365’s Power Automate connector can help connect your helpdesk with Microsoft and other business applications, so repetitive tasks can happen automatically instead of relying on someone to do them every time.
Learn more about the Desk365 Power Automate connector
And if you need a more customized connection, Desk365 also provides APIs that you can use to connect the helpdesk with other systems.
11. Give yourself time before switching off the old system
Finally, don’t be too quick to shut down your old environment.
Give your team some time to make sure everything they need is available in Microsoft 365.
You may discover an old file someone still needs or an application that was still relying on the previous setup.
Once you’re confident that everything has moved, users are comfortable, and there are no important dependencies left, you can start retiring the old environment.
Microsoft 365 migration checklist: A ready-to-use template
You’ve made it through the migration steps. Now here’s something you can actually use.
Save this checklist, share it with your IT team, and tick things off as you work through your migration.
You don’t need every item for every migration. Simply keep the ones that apply to your organization.