

Creating professional and visually appealing emails is crucial for effective communication, especially in a business setting. One common challenge many users face when using Microsoft Outlook is ensuring that images and signatures in emails are properly sized.
Oversized images can lead to slow loading times, distorted layouts, and an unprofessional appearance, while signatures that are too large or too small can impact the overall readability and professionalism of the email.
In this article, we’ll explore some simple and effective techniques for resizing images and signatures in Microsoft Outlook, helping you overcome these pain points and create emails that leave a lasting impression on your recipients.
Transform customer inquiries into manageable tickets with ease!
What are the common issues with oversized images?
Common issues with oversized images in Outlook include:
Slow email loading: Large images can significantly increase the size of your email, leading to slower loading times. This can be frustrating for recipients, especially if they have a slow internet connection.
Layout disruption: Images that are too large can disrupt the layout of your email, pushing content out of place and making it difficult for recipients to read and understand your message.
Increased spam risk: Emails with very large images can sometimes be flagged as spam by email clients, including Outlook. This means your email might not even reach the intended recipient’s inbox.
Compatibility issues: Different versions of Outlook and other email clients may display oversized images differently. This can lead to inconsistencies in how your email appears to recipients, potentially impacting its effectiveness.
By resizing images before including them in your emails, you can avoid these issues and ensure that your messages are both visually appealing and functional. In the following sections, we’ll explore various methods for resizing images and best practices for optimizing images for emails
Understanding image size and resolution
When dealing with images in emails, two key factors come into play: image dimensions and resolution. Understanding these concepts is essential for optimizing your images for both appearance and performance.
Image dimensions
Image dimensions refer to the width and height of an image, usually measured in pixels. For example, an image with dimensions of 800×600 pixels is 800 pixels wide and 600 pixels tall. When you resize an image, you’re essentially changing its dimensions to better fit the context of your email.
The dimensions of an image directly influence how it appears in your email. If an image is too large, it can overpower the text and other elements, making the email look unbalanced. On the other hand, if it’s too small, it might not have the intended impact or could be overlooked by the recipient.
Resolution
Resolution, often measured in pixels per inch (PPI) or dots per inch (DPI), refers to the number of pixels in a given area of an image. It determines the image’s clarity and detail. While resolution is more critical for print media, it still plays a role in digital images, especially when viewed on high-resolution screens.
For emails, a resolution of 72 PPI is generally sufficient. Higher resolutions can increase the file size without providing any noticeable improvement in quality when viewed on most screen.
The impact on email appearance and loading time
The dimensions and resolution of an image can significantly impact the appearance and loading time of your email. Large, high-resolution images can slow down the loading time, which might frustrate recipients and lead them to delete the email before it even fully loads. Additionally, images that are too big can disrupt the layout of your email, making it harder to read and navigate.
By understanding and adjusting the dimensions and resolution of your images, you can ensure that they enhance your email’s appearance without negatively affecting its performance. In the following sections, we’ll explore methods to effectively resize and optimize your images for the best email experience.
How can you resolve the issue?
The solution for preventing Outlook from showcasing the oversized images is straightforward: opting for smaller images in your emails. This means that you have to resize the image manually before uploading it instead of resizing it.
Then, upload the image to your email notifications or email signature again, ensuring it’s resized to the correct dimensions to avoid further adjustments after the upload.
Here’s a step-by-step guide on how to resize images on both Windows and Mac:
For Windows users:
If you are a Windows user, then you can resize the image with the help of ‘Photos app’. Follow the steps below to resize the image according to your custom needs in Outlook.
1. Open the image in the Photos app.
- Double-click the image file to open it in the Photos app.
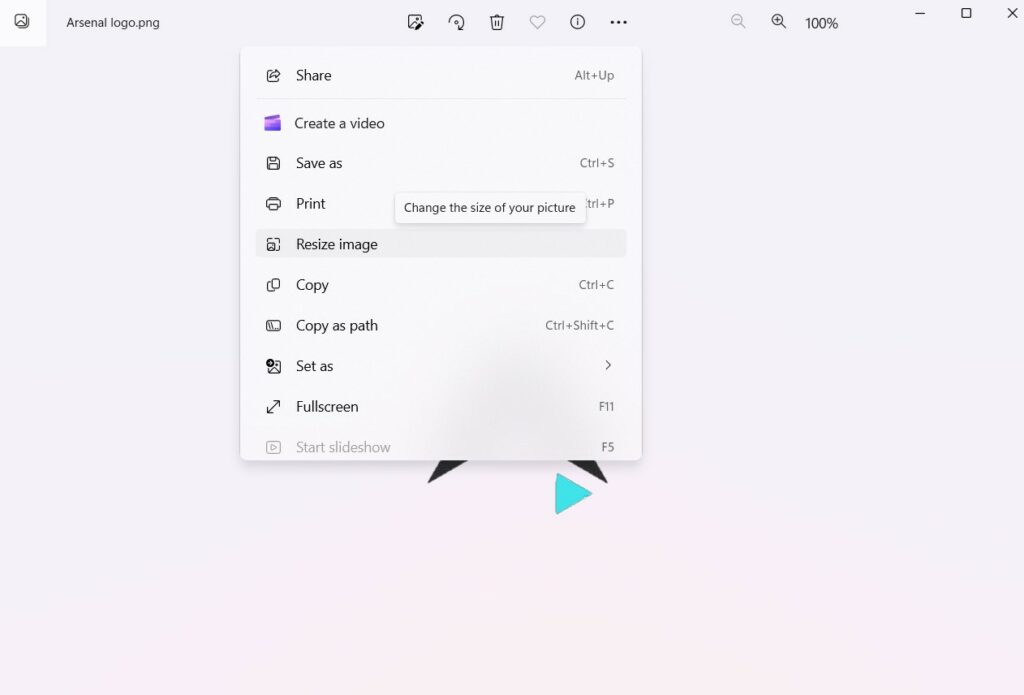
2. Access the resize option.
- Once the image is opened, click the three dots in the top.
- Select ‘Resize’.
3. Set your preferred size.
- This will open a dialog box where you can adjust the image size according to your requirements.
- Modify the dimensions as needed in the dialog box.

4. Save the resized copy.
- After setting your new dimensions, click ‘Save’.
For Mac users:
If you are a Mac user, you can resize the image with the help of ‘Preview’. Follow the steps below to resize the image according to your custom needs in Outlook.
1. Open the image in Preview.
- Locate the image file and right-click it.
- Select ‘Open With’ and choose ‘Preview’.
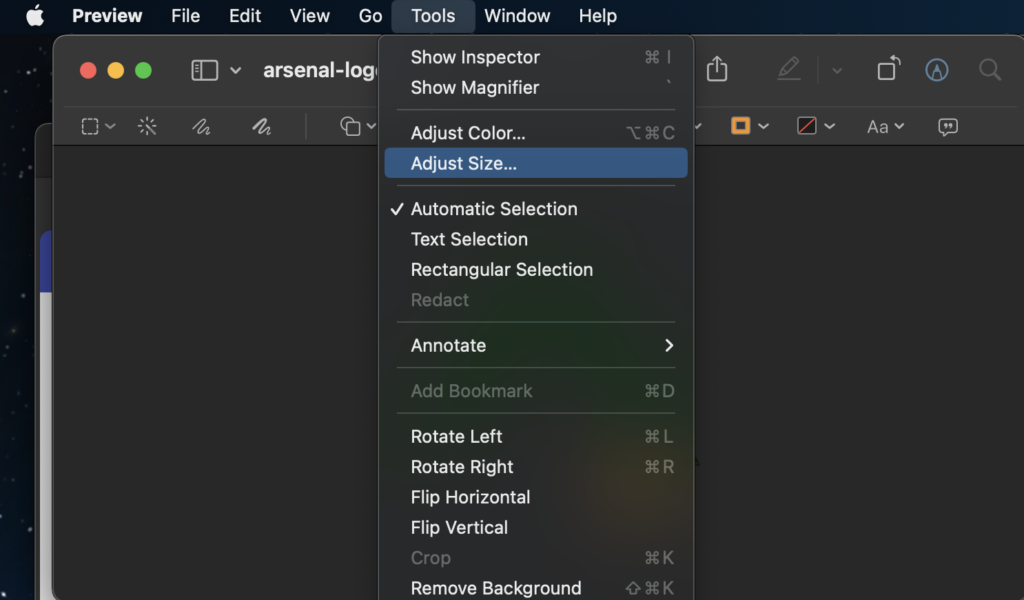
2. Click on ‘Tools’ and then ‘Adjust Size’.
- This will open a dialog box where you can adjust the image size according to your requirements.
3. Customize the size.
- Modify the dimensions as needed in the dialog box.
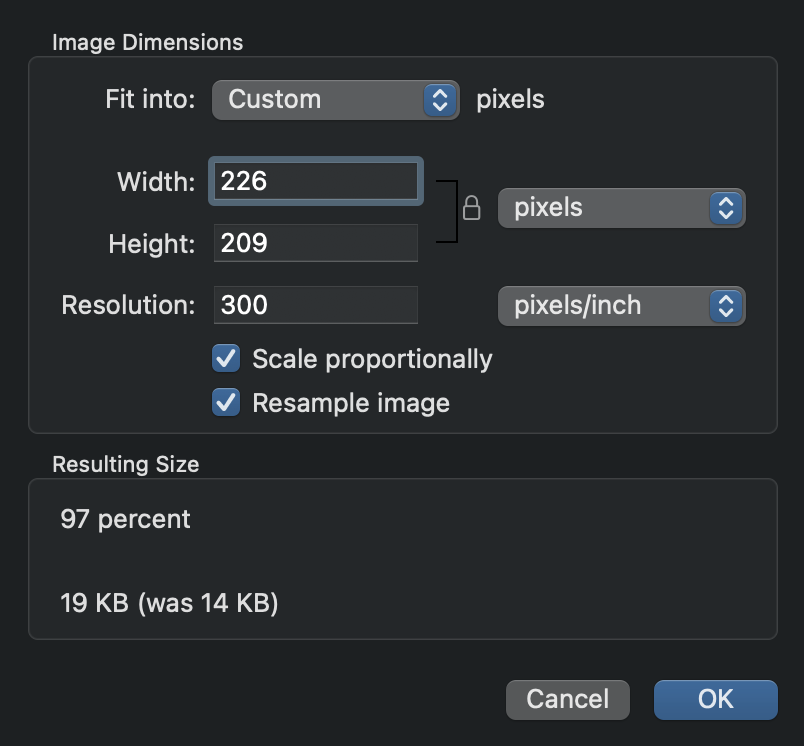
4. Save the resized image.
- Click ‘Ok’, and then save the newly resized image.
Upload the resized image in Email
Before uploading your images, ensure that your images are of the correct size. This will prevent Outlook from displaying them as oversized images.
Now, upload your resized image. For instance, here it is added to the signature.
The image now gets fit in and appears perfect when it is received via Outlook.
In summary, getting a handle on resizing images and signatures in Microsoft Outlook is crucial for crafting emails that look professional and appealing.
Tackling the common issues of oversized images and signatures ensures that your emails are not just easy on the eyes but also quick to load and well-organized.
By putting into practice the tips and tricks we’ve shared, you can find that sweet spot in your email design, making a great impression on your recipients and boosting the impact of your messages.
Frequently asked questions
Resizing images helps improve email loading times, readability, and overall presentation.
A resolution of 72 PPI is sufficient for email images, balancing clarity and file size.
Use the Photos app on Windows to adjust image size and save a resized version for Outlook.
Use Preview to modify image dimensions, then save the resized file to upload in Outlook.